Understanding bleeds in printing and how they affect your images is vital! If you’re creating your own art, a self-publishing indie, or just working on your cover, it’s important you define bleed area accurately before you begin your image.
Remember the line in Predator when Arnie, muscles bulging out ridiculously from every inch of his body, says, “if it bleeds, we can kill it?” He was referring of course to his alien hunter. The one with a face only a mother could love. But in the world of book design, it’s the direct opposite. If it doesn’t bleed, then your printer will kill it. But what is bleed? How does it impact a book’s design? And why is it essential that you understand bleeds in printing before you begin creating illustrations of cover art.
Let’s Define Bleed
We do a lot of work with children’s book authors here at Old Mate Media, where illustrations are a critical part of production. However, even those planning to self-publish novels or other genres should pay heed. You will still need a cover. Plus, you may have the odd image inside your masterpiece that may require bleed, like that “About the Author” page.
When first thinking about the design of your book, you should think about your trim size. This is effectively the final dimensions of the printed book. Bleed refers to a section of the image that exists beyond the trim size. It’s literally cut-off during the printing of your book. But why would you need an image to go beyond the dimensions of your book?
It’s effectively a safety net. During the printing process, components can shift slightly. The paper may move, or on some printers, the plates that “stamp” the page onto the paper can shift. If that happens when you have an image that goes right to the edge of your page and there is no bleed, you end up with an unsightly white line down the edge. (Assuming you are using white paper).
By bleeding an image beyond the trim size – often called a full bleed image - if there is any movement in the printing process, there is more image in the bleed area to compensate. So if the paper moves a few pixels, then a few pixels of the image in the bleed area will be pulled into the trim size.
How will the Bleed Area Impact Design?
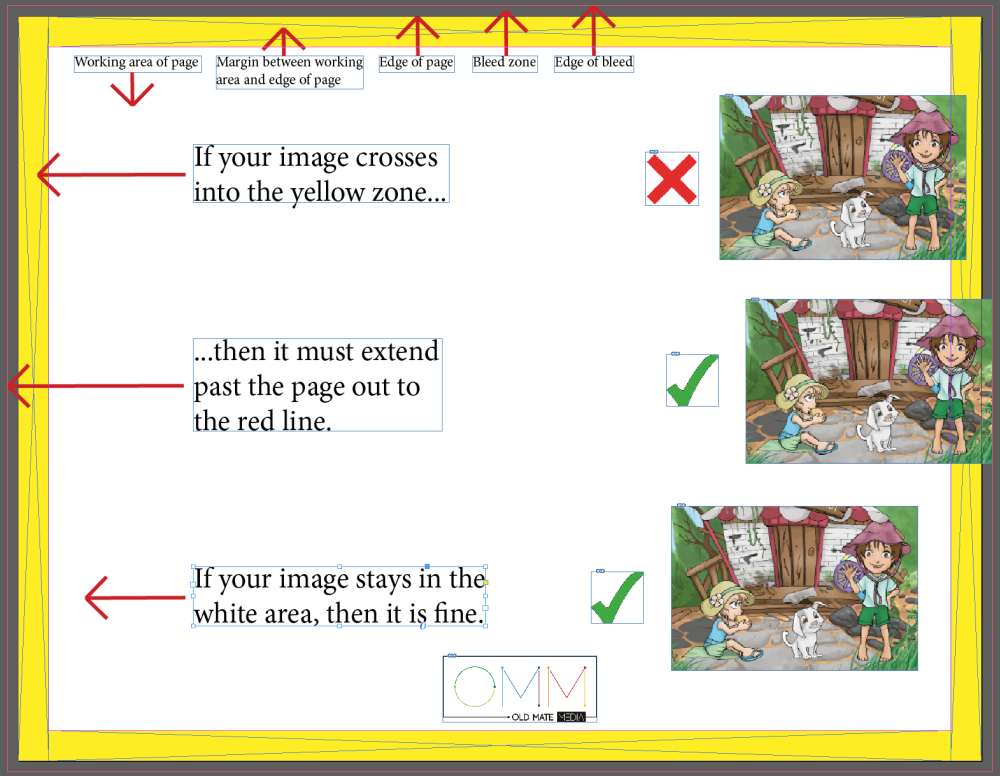
All printers have slightly different rules they work to, but all will require bleed of some sort. When self-publishing, your submitted work is going to be checked by a computer, not a human. Computers have no grey area. They see your submission in black and white. The computers that do that check for places like IngramSpark and KDP are programmed to look for any image that encroaches on the “safe zone” which is near the edge of the final trim size. This is typically the first 0.3” of space along all edges of your page.
If your image encroaches into that “safe zone” it is considered a full bleed image, and must extend beyond the trim size limits to the bleed lines. It must have bleed. If it is inside that 0.3” margin required by the printer, then it can sit alone on the page hanging out next to the text.
So where does the bleed area end? The bleed lines are typically 0.125” beyond the edge of the final time size. Here is all that information in image form.
Where you start running into big, big trouble is if your art was supplied at the trim size and exactly at 300 dpi. (If you don’t know what dpi means, there is a full guide here.) As 300 dpi is the minimum resolution for image printing for most printers, you cannot expand this image without decreasing the dpi. As soon as you try and make the image bigger so that it can extend 0.125” through the bleed area to the bleed lines, the dpi goes down. Suddenly it is 280 dpi. Our helpful computers over at those print-on-demand services will not accept this image, even though you now have bleed.
How Should Artists Ensure they are ready for Full Bleed Printing?
When the artist looking after your children’s book illustrations – be it yourself or someone else - is laying out their canvas, they need to know if you intend to do full bleed printing. They need to know if the image will extend to the edge of your book. For cover art, this is almost always the case, but for internal illustrations, there may be variation. Armed with this knowledge, your artist should then make sure no important components are near the edge of a page. Any detail at the edge, is likely to be pulled into the bleed area, and therefore cut out of the book.
When communicating with an artist, there is a simple rule of thumb you can follow. Say that you need an image at your set dimensions, plus 0.125” inch extra for the bleed area. If you are working in pixels – which is what we do – then you’d say, plus 38-pixels image bleed. This is because 0.125” converts to 38 pixels at 300 dpi (which is the minimal printable resolution for most printers).
As an example, let’s say you were making an 8.5” by 8.5” children’s picture book with full page illustrations. You’d therefore say to your artist the following. Please give me an 8.5 x 8.5-inch image, with 0.125-inch of bleed on all sides at 300dpi. You should then receive an image that is 8.625x8.625-inch. This would be perfect.
An example of bleeds in printing and design.
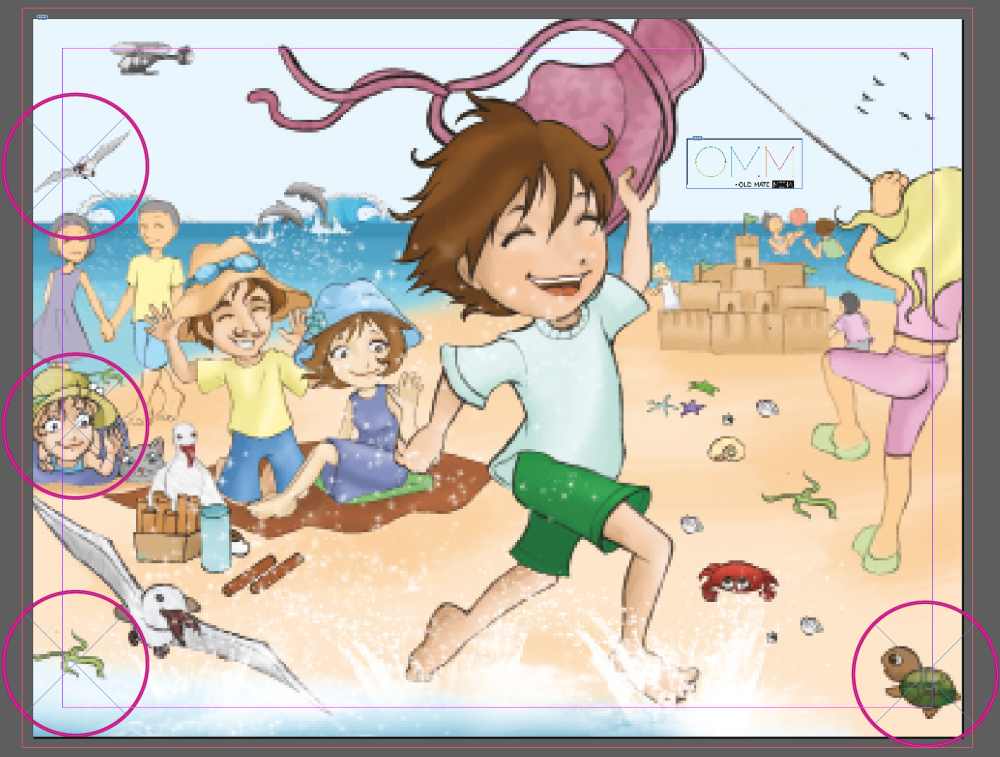
I'm going to quickly take you through a real world example of full bleed printing. Joining me for the ride is Willy Nilly, start of my children's book series The Wild Imagination of Willy Nilly. (I'd love for you to grab a copy!). In this first image, you can see a full bleed image that hasn't considered the need for bleed. Take note of the elements I have circled. These are details that are very close to the edge.
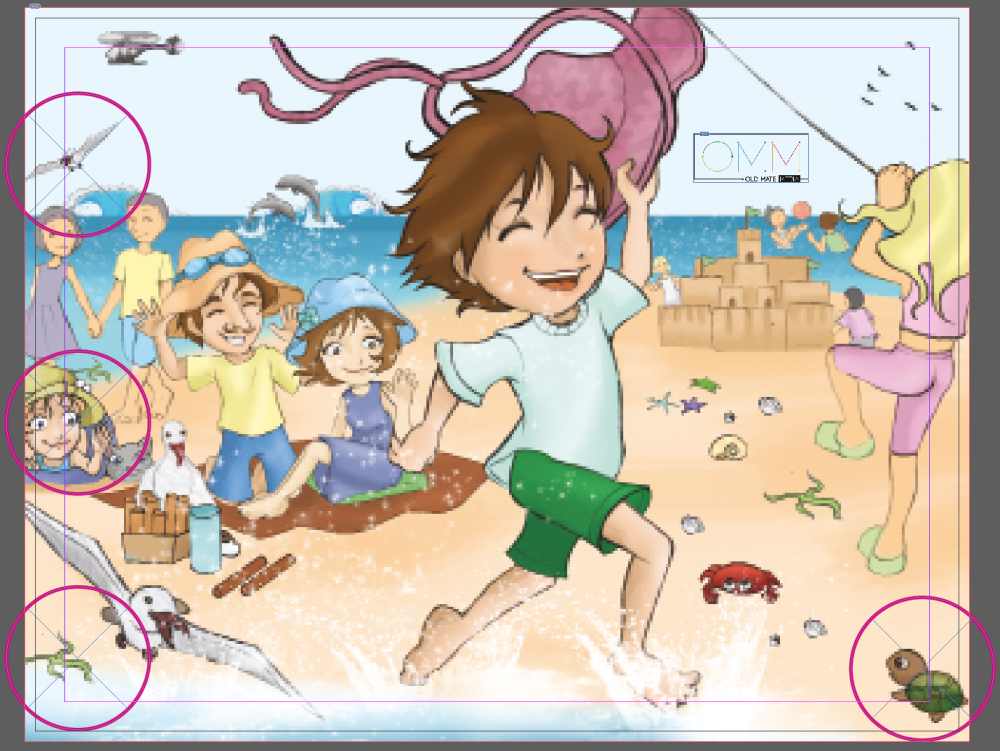
Now, in this second image, I have expanded the art so it goes through the bleed area up to the bleed line. You can clearly see the black line, which is the actual edge of the page. This image was designed at 600 dpi, so I'm able to expand it while retaining print-worthy resolution. It's now ready for full bleed printing.
Finally, in this third image, you'll see what happens when the final image is exported. You can see the circled elements from earlier are now off the page somewhat. Particularly painful is Willy's sister Suzie, who has a part of her eye off the page.
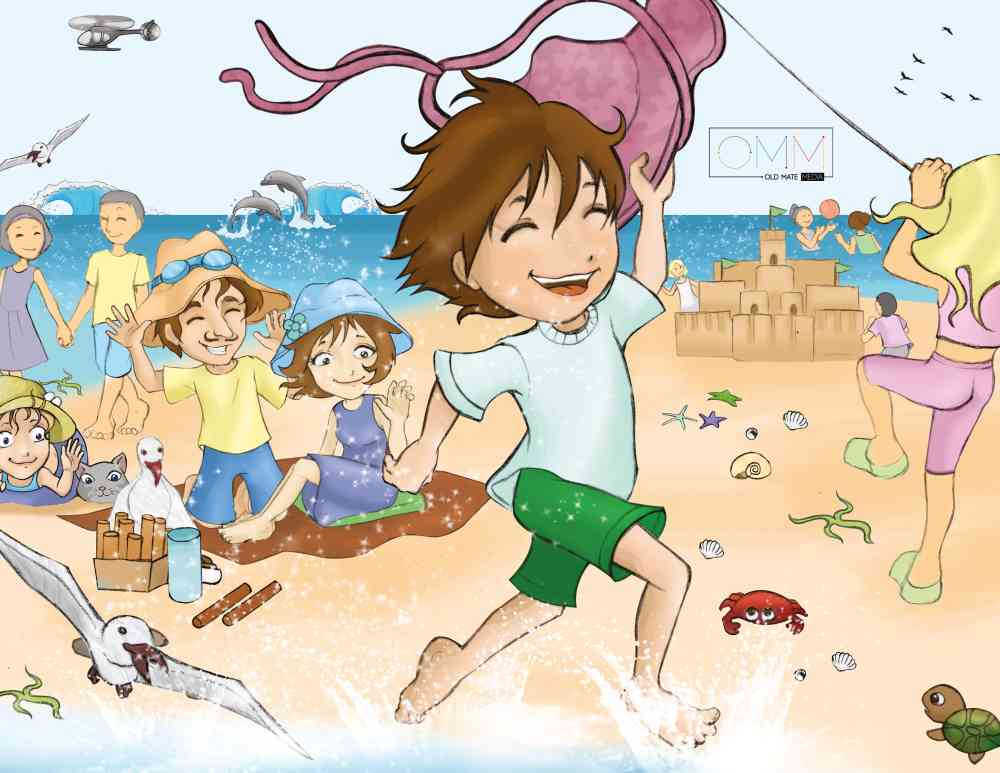
Thankfully, this was not the final image. Seeing the problem I had with bleed, my artist added 0.125" to the art on all edges before final submission. Otherwise, in order to show all the details on this image, the image would have had to sit completely within the safe zone, with a white border around it. That's not what I wanted: I wanted full bleed printing.
How to define Bleed with eBooks and ePubs?
Understanding bleed is an issue you only need to worry about with printed books. When looking at bleed and ePubs, you’re talking about something that will appear on a screen rather than paper. So bleed in its traditional sense is irrelevant. With illustrations for digital art, you need to be more concerned with different screen dimensions. For example, a Kindle, a Samsung tablet and an iPhone are all different dimensions. This is why you get letterboxing – black bars on the side of your book – as it’s impossible to create a one-size-fits-all image.
In Old Mate Media’s opinion, even if you are making a book for digital primarily, consider bleed. While irrelevant to digital formats, you don’t want to be readdressing your art if you ever decide to make a print edition. Just stay cognisant of the fact that at some point in your book’s future, the 0.125-inch outer edge could be chopped off. So don’t leave any important details in there!
Where to Next?
We hope you liked our article on full bleed printing and now know how to define bleed. Why not continue to make the most of Old Mate Media’ free guides. Alternatively, if you need any help with the production of your book, check out our services menu. We offer bespoke packages for indie authors that provides as much or as little support as required. From developmental edits, to illustrations, to website landing pages and full design, we do it all! Ask for a quote at any time.

